
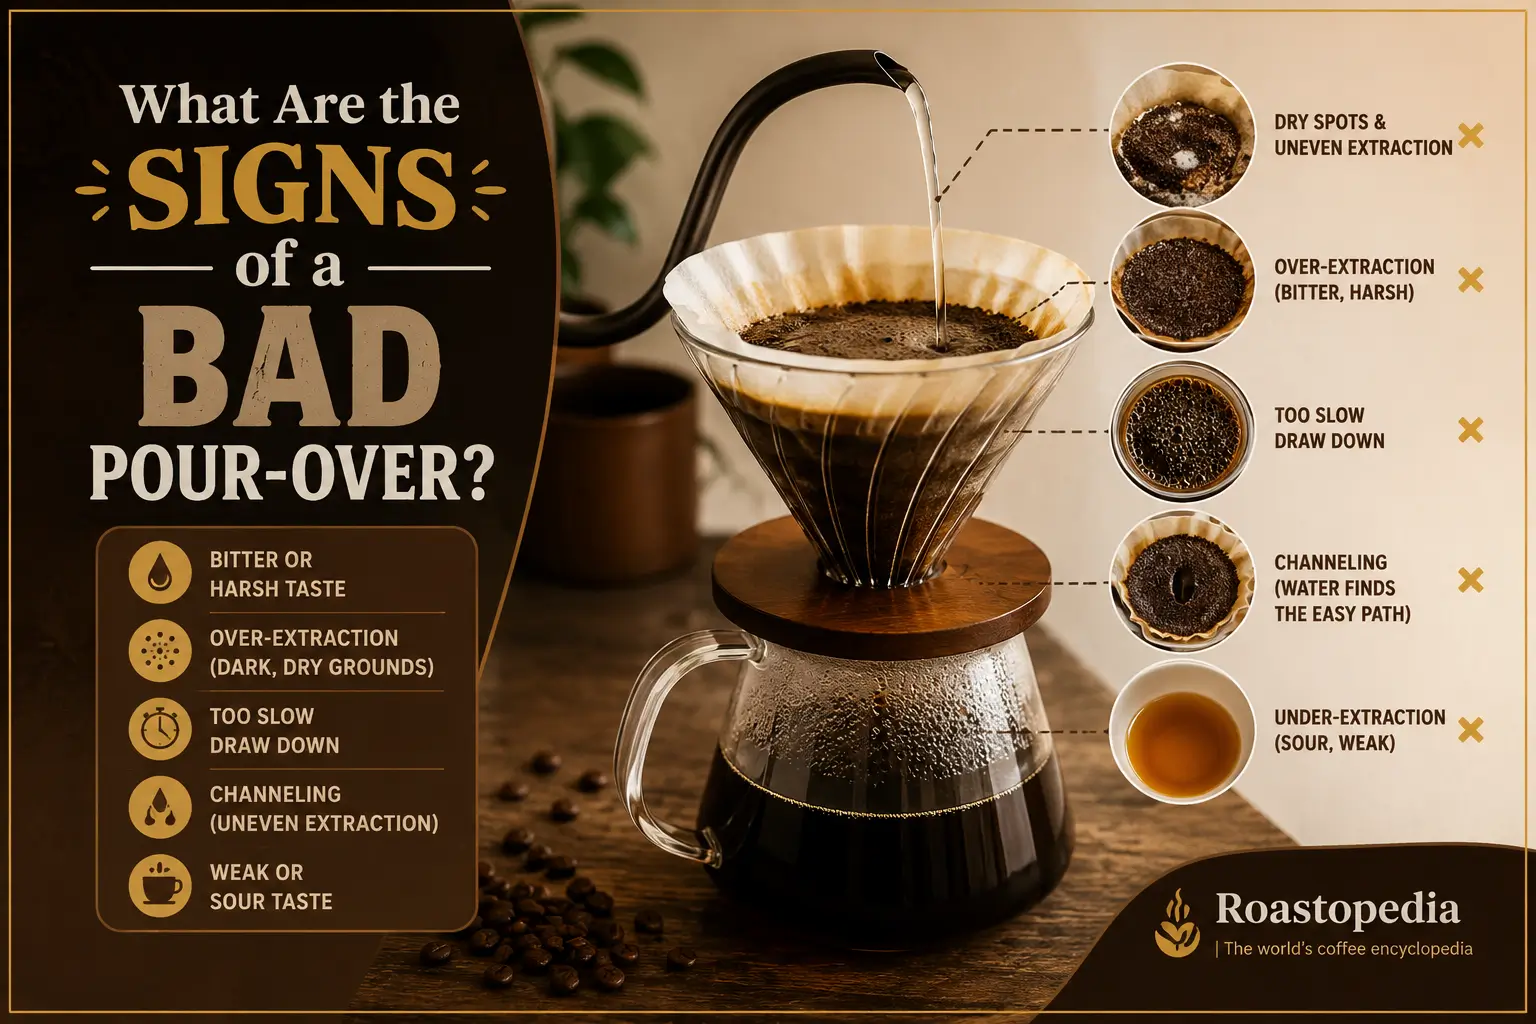
A pour-over is one of the most transparent brewing methods in coffee. Unlike espresso, where the machine hides most of the process behind a portafilter, or a French press, where the grounds steep out of sight, a pour-over happens in full view. That transparency is a gift: it means nearly every mistake in the brew leaves a visible, audible, or tasteable trace. So, what are the signs of a bad pour-over and, most importantly, how can you fix pour-over problems? Learning to read the signs of a bad pour-over and how to fix them is the fastest way to go from an inconsistent cup to a consistently good one.
What “Bad” Actually Means in a Pour-Over
Before diagnosing a bad cup, it helps to define the target. A well-executed pour-over should be clean, balanced, and free of harsh or muted flavors, with the character of the coffee flavors inherent to the bean coming through clearly. When a pour-over is “bad,” it almost always falls into one of three broad categories:
- Under-extraction — not enough soluble material was pulled from the grounds, leaving the cup sour, sharp, and thin.
- Over-extraction — too much material was pulled, including bitter, astringent, and vegetal compounds that shouldn’t dominate the cup.
- Uneven extraction — some grounds were over-extracted while others were under-extracted at the same time, producing a confusing mix of sourness and bitterness in the same sip.
Nearly every visible or tasteable sign of a bad pour-over traces back to one of these three outcomes, which is why understanding how water temperature affects coffee extraction and how grind size interacts with contact time is central to diagnosing what went wrong.
The Visual Signs of a Bad Pour-Over
Long before a pour-over reaches the cup, it usually announces its own problems.
An Uneven or Cratered Coffee Bed
After brewing, the spent grounds should sit as a roughly flat, slightly domed bed inside the filter. A bed with a deep crater in the center, a dry ring of unsaturated grounds around the edge, or grounds stuck high on the filter walls indicates that water didn’t move evenly through the coffee. This is a hallmark of poor pouring technique or a grind that is too coarse or too inconsistent, similar in principle to the way fine grinding increases channeling risk in espresso — pour-over channeling is the same phenomenon, just slower and more visible.
A Drawdown That’s Too Fast or Too Slow
The “drawdown” is the time it takes for water to pass through the bed and finish dripping into the carafe. A dramatically fast drawdown usually signals a grind that’s too coarse, an under-filled bed, or a filter that isn’t seating properly. A drawdown that stalls or drips at a crawl usually points to a grind that’s too fine, too much fines migration, or a clogged filter. Both extremes are visual red flags before a single sip is taken — for a V60, this is especially diagnostic, since how long a V60 drawdown should take has a fairly well-established window that experienced brewers use as a first checkpoint.
Excess Foam, Bloom, or Bubbling That Won’t Settle
A healthy bloom — the initial bubbling that happens when hot water first hits fresh grounds — should expand, hold briefly, then settle within 30–45 seconds. A bloom that keeps foaming aggressively throughout the entire brew, rather than calming down, often signals beans that are unusually fresh and still releasing large amounts of CO₂, which relates to why coffee requires degassing before brewing. Excess gas escaping mid-pour can push water around the grounds instead of through them, disrupting even extraction.
Murky, Cloudy, or Oily-Looking Coffee in the Carafe
A finished pour-over should generally run clear to light amber, not muddy or opaque. Cloudiness can indicate excessive fines passing through the filter, a torn filter, or grounds that were over-agitated during the pour. A visible sheen or oiliness on the surface is more common with darker roasts, since some coffee beans are naturally oilier than others depending on roast level and bean density, but an unusually heavy oil slick on a light roast is worth investigating as a possible filter or freshness issue.
The Sensory Signs: Taste and Aroma Red Flags
Once the visual clues have been checked, taste is the final and most important diagnostic tool.
Sharp, Vinegary, or Sour Flavor
A sour or acidic cup that tastes unpleasantly sharp — rather than pleasantly bright — is the clearest sign of under-extraction. This is different from the natural brightness of a coffee grown at high altitude, since soil, altitude, and climate shape a coffee’s inherent acidity at origin; an under-extracted cup tastes sour in a way that feels unbalanced and one-dimensional rather than complex. Understanding why some coffees are more acidic than others helps separate a brewing fault from a bean characteristic.
Harsh, Dry, or Ashy Bitterness
Bitterness that lingers, coats the tongue, and dries out the mouth is the signature of over-extraction. This is distinct from the pleasant, chocolatey bitterness found in well-developed darker roasts, since roast level itself plays a major role in flavor development. A bad pour-over’s bitterness tastes hollow and ashy rather than rounded.
Thin, Watery, or “Weak” Body
A cup that tastes diluted, lacks aroma, and fades quickly on the palate is often the result of an incorrect coffee-to-water ratio, too coarse a grind, or a drawdown that finished too quickly for full extraction to occur.
Muddy, Vegetal, or “Off” Flavors
Grassy, papery, or muddy notes that don’t match the roaster’s tasting notes can point to stale beans, poor water quality, or a filter that wasn’t rinsed before brewing (leaving behind a papery taste). This is also where checking whether green coffee lost quality during storage before it was even roasted becomes relevant — sometimes a “bad brew” is actually a bean problem in disguise.
Inconsistent Flavor from Sip to Sip
If the first few sips taste sour and the last few taste bitter, that’s a textbook sign of uneven extraction — part of the bed was under-extracted while another part was over-extracted, usually because of channeling or an inconsistent pour.
Common Problems and How to Solve Them
The table below breaks down the most frequent pour-over problems, matched to their most likely fix.
Problem: Sour, sharp-tasting coffee. This almost always signals under-extraction. Fix: Grind finer, extend the brew time slightly, or raise the water temperature. Confirm you’re within the recommended range described in guidance on how water temperature affects extraction, since water that’s too cool will under-extract even a perfectly ground coffee.
Problem: Bitter, harsh, or ashy coffee. This points to over-extraction. Fix: Grind coarser, shorten the total brew time, lower the water temperature slightly, or reduce agitation during the pour.
Problem: Drawdown finishes too quickly. Water is moving through the bed before it can properly saturate the grounds. Fix: Grind finer, use a slower and more controlled pour, or check that the correct volume of coffee is in the filter (an under-dosed bed drains much faster).
Problem: Drawdown stalls or takes too long. Water is struggling to pass through the bed. Fix: Grind coarser, reduce agitation, and check the filter isn’t clogged with excess fines. If it happens consistently on the same device, revisit the benchmark for how long a V60 drawdown should take and adjust the grind setting from there.
Problem: Uneven, cratered coffee bed after brewing. Water channeled through weak points in the bed instead of moving evenly. Fix: Improve pouring technique with slow, deliberate concentric circles, use a more even grind, and avoid pouring directly against the filter wall.
Problem: Papery or cardboard-like taste. This is usually the filter, not the coffee. Fix: Rinse the paper filter thoroughly with hot water before adding grounds, discarding the rinse water from the carafe.
Problem: Weak, watery, underwhelming cup. The ratio of coffee to water is too low, or extraction stopped too early. Fix: Increase the coffee dose, tighten the grind slightly, or extend contact time.
Problem: Muddy or vegetal off-flavors. This can stem from stale beans, poor storage, or low-quality water. Fix: Use beans within their ideal freshness window, store them properly, and brew with filtered water. If the issue traces back further, it may relate to how the green coffee was stored before roasting rather than anything done in the brewing itself.
Problem: Bloom won’t settle or keeps bubbling throughout the brew. The beans are releasing an unusually large amount of CO₂. Fix: Extend the bloom time slightly before the main pours, and understand that this is closely tied to why coffee needs to degas before brewing — very fresh beans sometimes benefit from a day or two of extra rest.
How to Confirm a Bad Pour-Over Isn’t a Bean Problem
Not every disappointing cup is a brewing fault. Before adjusting grind size or technique, it’s worth ruling out the coffee itself:
- Check the roast date. Coffee brewed too soon after roasting can bloom excessively and taste unbalanced, while coffee brewed long after roasting can taste flat and stale.
- Consider the roast level. A cup that tastes thin or sharp might simply be a naturally bright, more acidic coffee rather than a brewing error, especially with light roasts, since roast level changes both flavor and perceived caffeine extraction.
- Rule out bean origin factors. Where and how a coffee was grown, including soil, altitude, and climate at origin, shapes its baseline flavor before it ever reaches a grinder.
- Cross-check against espresso or another method. If the same beans taste off across multiple brewing methods — including on an espresso machine, where problems like channeling cause uneven extraction in a very similar way to pour-over — the fault likely lies with the beans, not the pour-over technique.
Preventing Bad Pour-Overs Going Forward
Most pour-over problems are preventable with a few consistent habits:
- Weigh, don’t eyeball, your coffee and water. Precision removes an entire category of extraction errors.
- Grind fresh and grind evenly. Inconsistent particle size is one of the most common causes of uneven extraction.
- Control your pour. A slow, steady pour in concentric circles saturates the bed evenly and avoids channeling.
- Rinse your filter. It takes fifteen seconds and eliminates papery off-flavors entirely.
- Track your variables. Note grind size, ratio, water temperature, and total time for every brew, and adjust one variable at a time rather than several at once.
Once these habits are in place, most of the visual and sensory signs described above become rare — and when they do appear, the diagnostic list above should point directly to the fix.
See Also
- How Long Should a V60 Drawdown Take?
- How Water Temperature Affects Coffee Extraction
- Why Does Coffee Require Degassing Before Brewing?
- Why Are Some Coffees More Acidic Than Others?
- The Role of Roast Level in Coffee Flavor Development
- Why Does Green Coffee Lose Quality During Storage?
- Why Does Channeling Cause Uneven Espresso Extraction Results?
References
- Specialty Coffee Association, “SCA Protocols: Brewing Control Chart,” Specialty Coffee Association Standards.
- Rao, S., The Coffee Roaster’s Companion, 2014.
- Hoffmann, J., The World Atlas of Coffee, Mitchell Beazley, 3rd Edition, 2018.
- Illy, A. and Viani, R., Espresso Coffee: The Science of Quality, Academic Press, 2nd Edition, 2005.
- Rao, S., Everything but Espresso: Professional Coffee Brewing Techniques, 2010.
- Batali, M. E., et al., “Titratable Acidity, Perceived Sourness, and Liking of Acidity in Drip Coffee,” ACS Food Science & Technology, 2020.
- Cordoba, N., et al., “Coffee Extraction: A Review of Parameters and Their Influence on the Physicochemical Characteristics of the Beverage,” Food Chemistry, 2020.